3 ingredient low calorie  bread

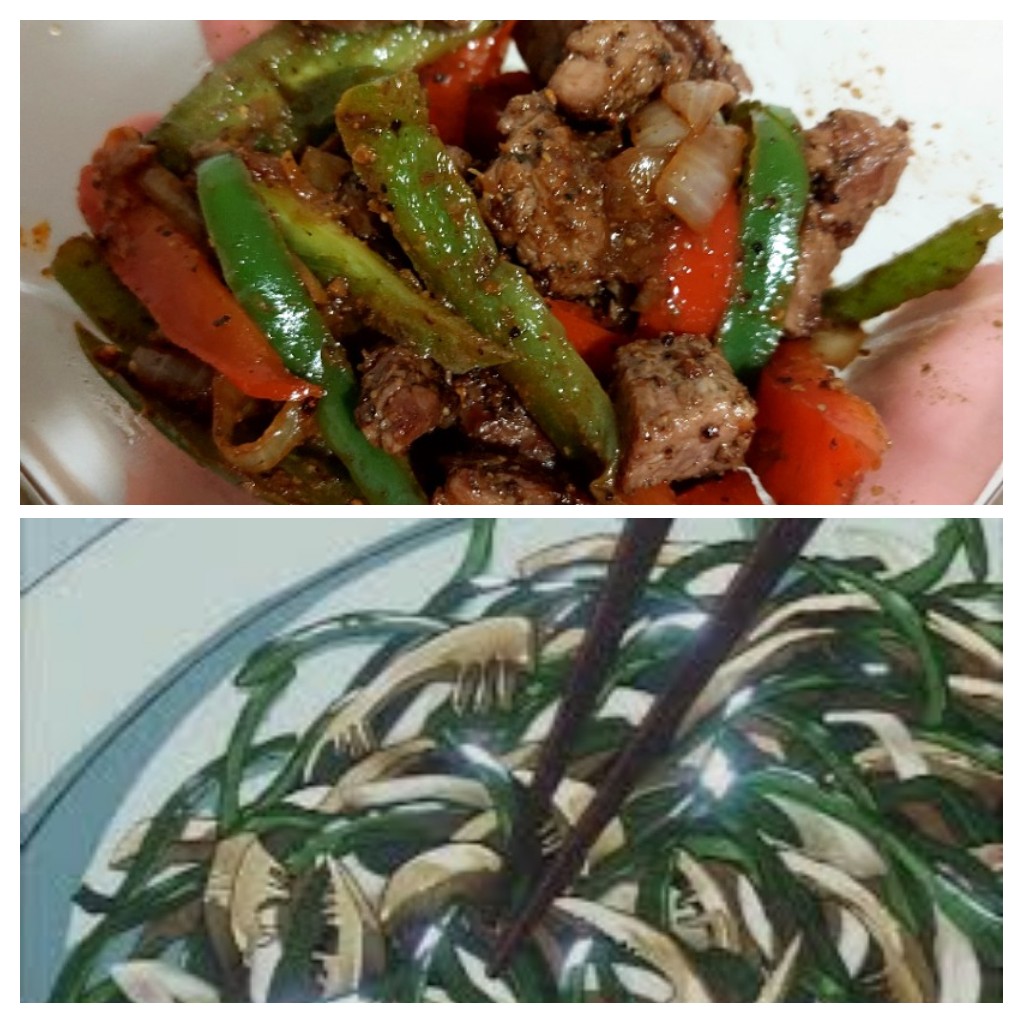
I’ve been bitten by the cooking from scratch bug in recent weeks. There have seen many recipes i have had a want to create over the years and have tried recipes from various regions of the country and a few overseas.  I have decided to take on a challenge in the kitchen of which I’ve never undertaken: making bread. This was a beginner friendly bread that I created using a few simple ingredients: bread flour, rapid rise yeast, and pink hymilayan sea salt.

To start, you will want to heat 1 and a half cups of water on the stove. Next, you will need 3 and a half cups of bread flower to go into a large bowl. Once this has been placed in the bowl, you will need to add a table spoon of rapid rise yeast and half of a tablespoon of pink Himalayan sea salt

Dry ingredients ready to rock and roll

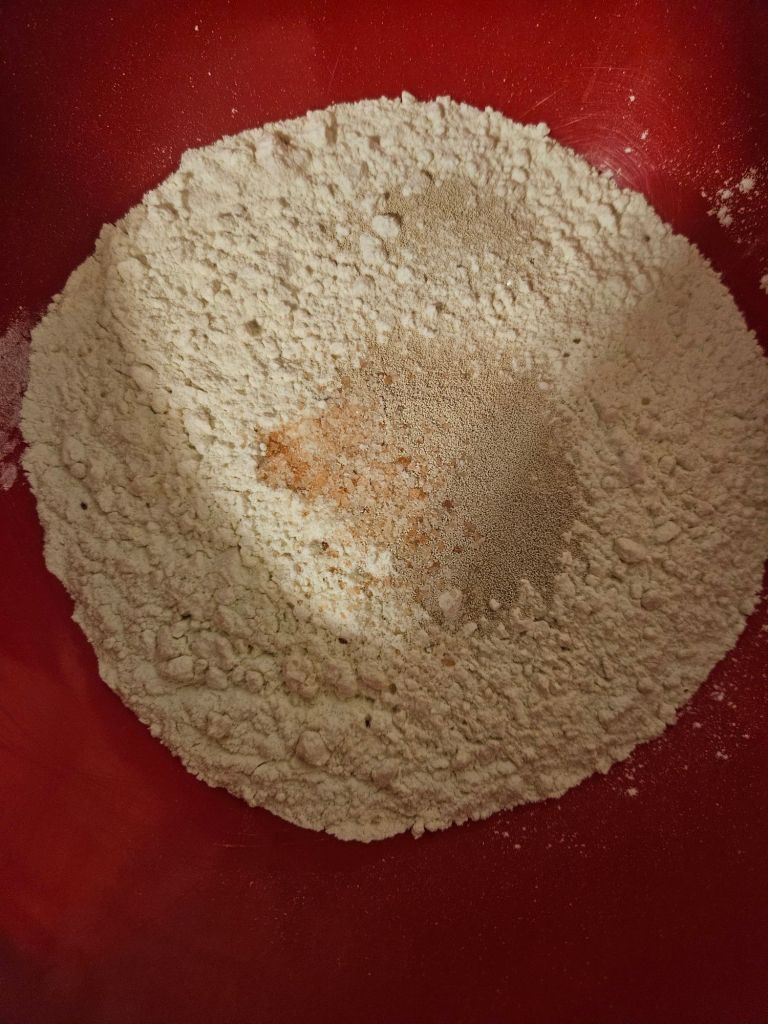
Once the dry ingredients are done the water should be nice and hot. Pour the water into the bowl and mix around until the flour is fully incorporated into the mix and form it into a ball.

I’m having a great time.  A ball if you will

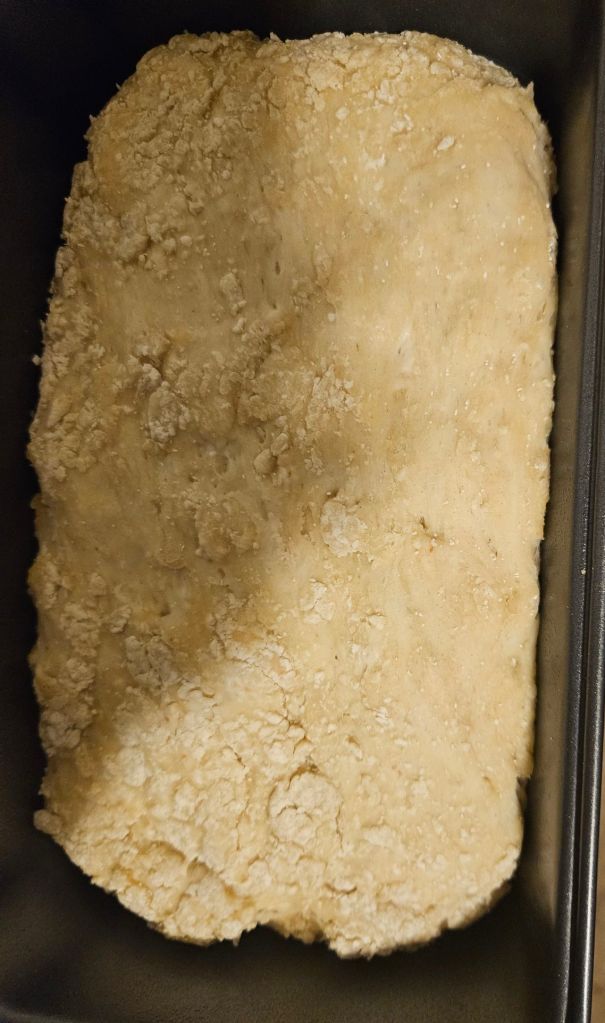
Once this is shaped into a ball, cover it and place it somewhere warm and let it sit for an hour to build up in size. Once that is done put it into a bread pan that has been sprayed with cooking spray and form it into the pan and let it sit for another hour.

Two hours later

Once the hour has passed, put your oven on 450. Once the oven is heated bake the bread for 20 minutes to completion and remove to cool.

Bonus tip: I forgot that scoring the bread helps the bread expand more.

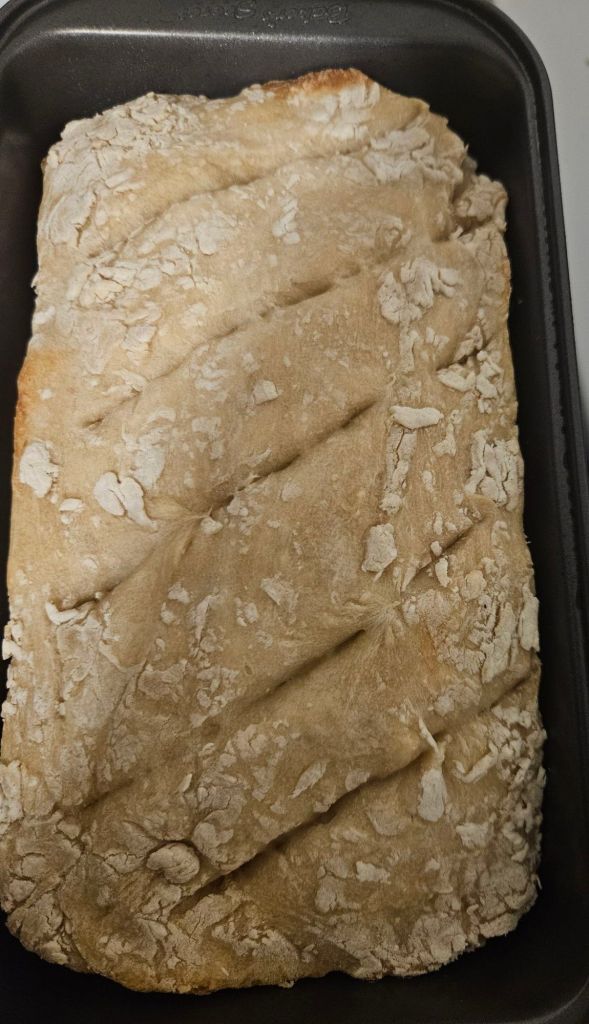
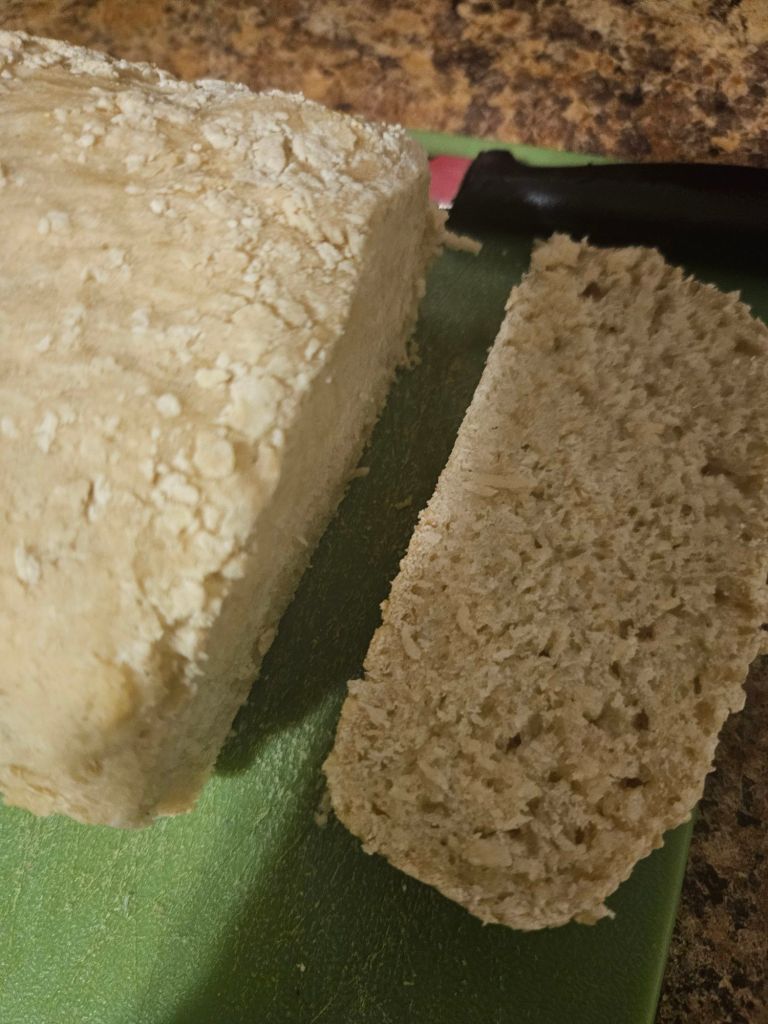
Once the bread has cooled, you will have a nice loaf of low calorie bread. I let a piece of this sit, but this bread lasted me about 5 days before it started to turn. I would recommend eating this right away while it is fresh.

Even without scoring the first time the bread looked great.

This was a wonderful first take on making a new dish. I realized this was rather small but I am looking to make it into larger loafs for the next time. This makes a very good peanut butter sandwich and with no preservatives, it was the most  guilt free pb&j that I have had in a while. Until the next time, dear readers, excelsior!

Buffalo chicken burritos

In the last few months, I have been on a low calorie high protein kick. There are several recipes I’ve come up with and seen that were absolutely mind-blowing. The latest recipe I came across was surprisingly filling and loaded with protein to meet my macros and was quite flavorful. That recipe would be buffalo chicken burritos. Bonus here. This is also a fun recipe one can make in a crock pot.

To start, you will need the following: 60 oz of chicken breast (about 4 large pieces), 2 cups of low or zero fat cream cheese, 4 oz of reduced fat cream cheese, 3 cups chicken Bone broth, 1/2 cup low calorie buffalo sauce  (I prefer franks red hot because it’s just that good so i cheated a little here, 1 1/2 cups white or jasmine rice ,2 cups of fat free cheddar cheese,10 low calorie tortillas (i used low cal high fiber wraps) and for seasoning I recommend a packet of ranch seasoning, paprika, garlic powder, black pepper, tumeric, cumin, and a little salt free mrs. Dash seasoning.

First, mix in all the seasonings into the chicken until the color changes. Second, slow cook the chicken on high for about 3 hours or until it reaches recommended serving temperature of 165 degrees Fahrenheit

Might not look tasty yet but  it smells delightful

While the chicken is cooking, cook the rice in the bone broth to allow it to soak in for extra protein. While that is boiling, take your cottage cheese, cream cheese, and buffalo sauce and mix it in a mixer/blender until it has combined smoothly into a creamy sauce.

We’re getting there little by little

Once the meat is done, sprinkle the cheese and pour the sauce over top and give it a good mixing. Once mixed, prepare your tortilla with 1/10th of the meat and rice and evenly wrap the burritos until all the ingredients are gone. Once completed, these are ready for serving or can be wrapped in foil to store for up to 60 days to enjoy for a quick meal.

Ready for assembly

This was an excellent meal prep that kept me full and was really easy to make. I hope this recipe makes for a wonderful meal prep or family meal for anyone reading this. Until the next time, dear readers, excelsior!

My burrito wrapping skills could use a little more work

Quick shrimp wraps

The year has flown by at a breakneck speed. With days seeming to fly by at light speed, it can be hard to keep track of things, let alone take the time out to cook. In response to this it’s easy to get a fast food meal out, but of course if you’re looking to eat something healthy and quick there is a fun quick recipe I’d like to share for your viewing pleasure: quick and easy shrimp and veggie wrap with chimchurri sauce. I used a simple assortment of veggies, but you’re free to add more as your heart desires.

Ingredients needed

1-2 lb frozen shrimp (tail off peeled and deveined preferred)

1 of each: green bell pepper and yellow pepper

2 cups fresh spinach

1 pack of 8 count high fiber Wraps

Assorted seasonings: for this batch, I used Mrs. Dash table blend seasoning, pepper, paprika, Tony’s creole seasoning, turmeric, and garlic powder.

For chimchurri sauce

1-2 lb of fresh parsley

1/4 cup oregano

2/4 red wine vinegar

6 cloves of garlic

A pinch of salt

2 dashes of red pepper flakes

2/3 cup olive oil

Step 1 – Be sure to thaw out the shrimp if you haven’t already done so. Be sure to double-check your shrimp for any impurities that may need to be removed.

Step 2 – After the shrimp have been thawed and cleaned, place the shrimp into a bowl and apply the assorted seasonings listed above. Set the shrimp to the side

Step 3- Chop peppers into strips and set aside in a bowl or container.

Step 3- In a food processor (or by hand), finely chop the garlic cloves and parsley and, upon completion, place into a bowl. Once in the bowl, apply the oregano, salt, red pepper flakes, olive oil and vinegar, and mix. Once all mixing has been complete, set this aside

Step 4- Heat up your desired cooking oil n a large saucepan and add the shrimp. Cook until the shimp is opaque in color and remove from heat. This should take roughly 5 minutes

Step 5- Once the shrimp has been removed, proceed to cook the pepper strips to your desired tenderness and remove from heat.

Step 6- Take one fiber wrap tortilla and apply a layer of spinach, followed by the pepper strips, and add a layer of shrimp and finally a helping of the chimchurri sauce.

Step 7- Enjoy!

The finished product!

And there you have it. A quick and easy, nutrient dense, and savory meal that can be enjoyed any day of the week. Feel free to add and subtract your favorite vegetables as you see fit for even more nutrients. Bon appetite dear readers, until next time!

Ending the year on a flavourful note

Holidays are a pretty busy time of year for everyone. It is easy to get lost in the shuffle and neglect things. One thing one should never neglect is one’s diet and nutrition. Last month I gave you a nice dessert so let’s balance that out with a nice simple savory dish: bell peppers and beef. While this was anime inspired from one of my favorite animes (cowboy bebop) I assure you that it the style will be a little different.

For this recipe we will require the following: 1 bell pepper of each color ( for this I only used red/green peppers to start), 1/2 of a small onion, 1 lb of beef chuck (you can substitute for 1 lb of mushroom and tofu for a vegetarian option), assorted spices and seasonings of your choice (Mrs. Dash, old bay, paprika, garlic powder, and pepper were used here) and honey sesame sauce (homemade or store bought)

First, clean your peppers and peel your onions. Once complete, mince your onions and place to side in a bowl. Proceed to slice your bell beppers into strips and add to the bowl with the onions. Lightly season your veggies with your seasoning mix and set aside.

Ready for the fire

Nexr, chop up your beef into bite-sized chunks and remove any gristle or fat as you go. Be sure to season your beef (or mushroom/tofu substitute) and place to the side.

I found the beef

Next, lightly oil your skillet and apply your seasoned beef, and cook thoroughly. Once cooked, set aside in a bowl.

Ok maybe I went a little toooo light on that oil.

Next you will place your veggies into the skillet and cook until tender. Once complete set aside in your bowl with the beef

Cook until the veggies comply

Lastly you can either caramelize the honey sesame sauce in the skillet or add the sauce after depending on your preferences. Once complete, you’re ready to go! Serve with your favorite beverage, and you’re ready to eat.

The whiskey is optional

And there you have it. A simple and quick meal you can enjoy any day of the week. This makes about four servings with my list of ingredients, and it is very filling for the small serving size. Going into the new year, I wish you nothing but the best and success in all your endeavors. Excelsior!

Who did it better?